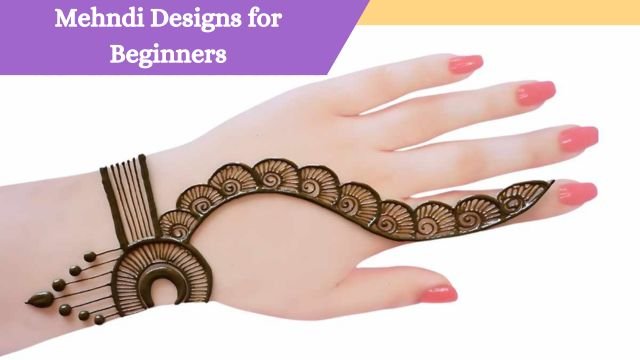
Mehndi, also known as henna, is a traditional form of body art that has been practiced for centuries across various cultures, especially in South Asia, the Middle East, and Africa. It’s a beautiful and intricate art form that adorns the hands and feet, typically for celebrations and special occasions. However, mehndi is not just for professionals; even beginners can create stunning designs with a bit of practice. In this blog, we’ll explore some simple and easy mehndi designs for beginners.
What You Need to Get Started
Before you begin creating your mehndi designs, it’s essential to have the right tools. Here’s a quick list of what you’ll need:
- Henna Cone: The henna paste is usually stored in a cone, similar to an icing bag, which allows for precise application.
- Paper Towel or Cloth: To wipe off any mistakes.
- Lemon Sugar Mixture: This helps in darkening the mehndi color. Apply it to your design once it dries.
- Plastic Wrap or Medical Tape: To cover the mehndi once it’s dried to avoid smudging and to help it set.
Simple Mehndi Designs for Beginners
Starting with simple designs is the key to building confidence and mastering the basics. Here are some easy-to-do mehndi designs for beginners:
The Basic Dot and Circle Design
One of the simplest designs to start with is the dot and circle pattern. This design involves drawing small dots and circles in various arrangements, which can be combined to create an attractive pattern.
- Step 1: Start by making a small dot at the center of the palm or the back of the hand.
- Step 2: Draw a circle around the dot. You can create as many circles as you like, expanding outward.
- Step 3: To add more detail, draw smaller dots or tiny petals around the circles.
This design is easy and helps in understanding the control of the henna cone.
Floral Patterns
Floral designs are very popular in mehndi, and they can be as simple or intricate as you like. For beginners, it’s best to start with basic flower patterns.
- Step 1: Start by drawing a simple flower with five petals. You can place this flower in the center of your hand or along the wrist.
- Step 2: Add leaves or vines around the flower to extend the design.
- Step 3: To fill in the gaps, you can add small dots or tiny buds.
Floral patterns are versatile and can be expanded easily, making them a great choice for beginners.
The Leafy Trail Design
The leafy trail is a beautiful and straightforward design that can be done on fingers, hands, or feet.
- Step 1: Start by drawing a small curved line on the finger or hand.
- Step 2: Add small leaves along the line. These can be simple oval shapes.
- Step 3: You can extend the trail by adding more curved lines and leaves, creating a flowing pattern.
This design is not only easy but also looks elegant, making it perfect for any occasion.
Read Also:
Step-by-Step Mehndi Designs for Kids
Best Mehndi Designs for Teej and Karwa Chauth
Floral Mehndi Designs for Back Hands
The Simple Paisley Design
Paisley designs are another common element in Mehndi. They are teardrop-shaped motifs that can be drawn in various sizes.
- Step 1: Draw a small paisley shape, starting with a small curve and closing it with a point, forming a teardrop shape.
- Step 2: Add a smaller paisley shape inside the first one, or you can fill it with dots or lines.
- Step 3: Surround the paisley with dots, small flowers, or leaves to complete the design.
Paisley designs are easy to draw and can be combined with other elements like flowers and leaves.
Geometric Patterns
Geometric patterns are a great way to practice your precision and control over the henna cone. These patterns often involve straight lines, triangles, squares, and other shapes.
- Step 1: Start with a small triangle or square in the center of your design area.
- Step 2: Add more shapes around it, keeping the lines straight and even.
- Step 3: To make the design more intricate, fill in the shapes with smaller patterns like dots or lines.
Geometric designs are perfect for those who prefer a more modern and structured look.
Tips for Beginners
Creating beautiful mehndi designs as a beginner can be challenging, but with these tips, you’ll find the process easier and more enjoyable:
- Practice on Paper: Before applying henna to your skin, practice your designs on paper. This helps you get a feel for the cone and perfect your patterns.
- Start Small: Begin with simple, small designs and gradually move on to more complex patterns as you gain confidence.
- Use Reference Images: Look at pictures of simple mehndi designs for inspiration. You can find plenty of beginner-friendly designs online.
- Be Patient: Mehndi takes time to dry and set. Allow it to dry completely before applying the lemon sugar mixture and covering it with plastic wrap.
- Experiment with Styles: Don’t be afraid to mix different elements like flowers, paisleys, and geometric shapes to create unique designs.
Common Mistakes to Avoid
As a beginner, it’s normal to make mistakes, but being aware of common errors can help you avoid them:
- Overloading the Cone: Squeezing too much henna out at once can lead to messy designs. Practice controlling the pressure to release just the right amount.
- Not Letting It Dry Properly: Rushing to remove the henna paste can lead to a lighter stain. Give it ample time to dry and set for a darker, longer-lasting color.
- Skipping the Lemon Sugar Mixture: This mixture helps the henna stay on your skin longer, leading to a more vibrant color. Don’t skip this step.
Conclusion
Mehndi is a beautiful art form that anyone can learn with practice and patience. Starting with simple and easy designs is the best way to build your skills and confidence. Whether you’re decorating your hands for a special occasion or just for fun, these beginner-friendly designs will help you easily create stunning mehndi patterns. So grab your henna cone and start practicing—you’ll be amazed at what you can create!
Related Posts
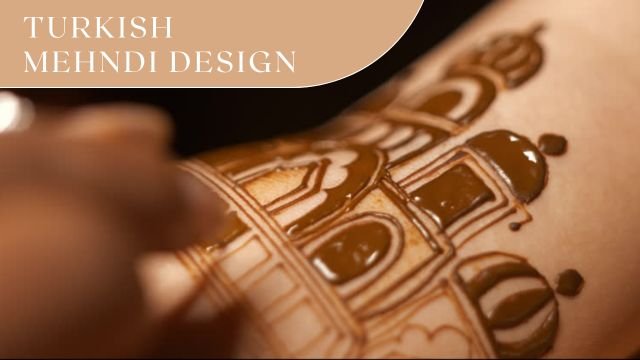
5 Simple and Beautiful Turkish Mehndi Designs for Festivals
As soon as the festive season arrives, women and girls…
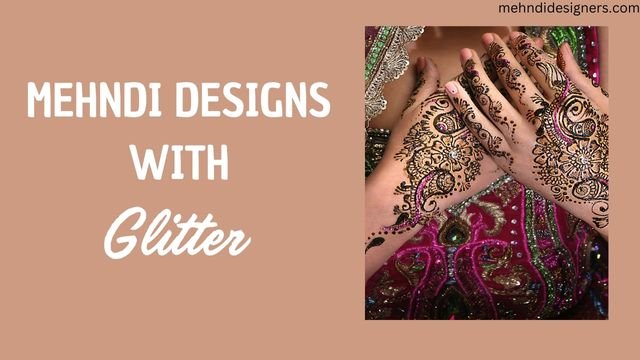
Mehndi Designs with Glitter and Stones for Parties
Mehndi, the ancient art of applying intricate designs to the…
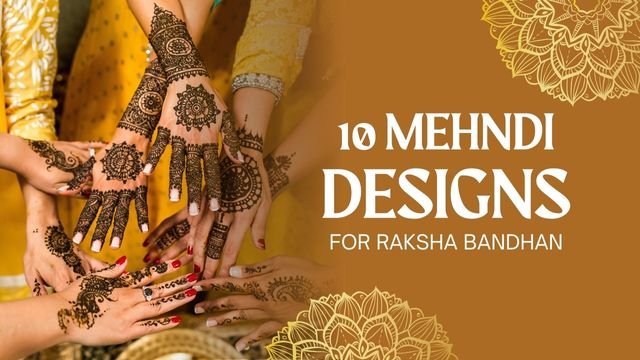
10 Trending Raksha Bandhan Mehndi Designs
The festivity of Raksha Bandhan, which is also known as…